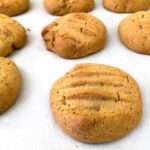
The recipe that was used around the world
This cookie recipe was given to me years ago by a well-traveled friend of mine who, at some time in the past, had met a woman called Pam when she was visiting Borneo. Pam gave her this cookie recipe. My friend carried on with her travels and lost touch with Pam. Eventually, after a few years of wandering the globe, she ended up living in France for a while, which is where I met her. At that point, she passed Pam’s cookie recipe on to me. I never got to meet Pam, or find out anything about her, but I often make her cookies and think about who she might be and where she could be in the world. Her cookie recipe has been carried like an Olympic torch all over the world, and now I am passing it on to you.
Who knows, maybe if it keeps being shared, one day it will end up back in the hands of Pam!
I love Pam’s cookie recipe as it is
- very easy to throw together,
- there are no waiting times (except for waiting for the cookies to cool off so that you can eat one without burning your fingers),
- and it is very versatile. You can substitute vegetable shortening for butter (in fact the original recipe doesn’t use butter), and you can add different combinations of chocolate, nuts or raisins, depending what is in your cupboard.
What Pam’s cookie dough should look like
The above photo shows what the cookie dough consistency should look like at the end. If it is a bit dry, add water, one teaspoon at a time until the dough sticks together. I find that using your hands to mix in the chocolate chips or nuts works best for getting them to spread evenly through the dough. For this batch, I chopped a couple of chocolate bars into pieces as I had forgotten to buy chocolate chips. It tastes just as good! It just means that you have more work to cut the chocolate into bits. The advantage is that you get to eat all the scraps that fall off the chocolate pieces.
Ideas for different combinations to change your cookies
In the recipe I have written to add 1 cup of chocolate chips, but if you want to mix things up a little, here are some ideas of combinations you could add:
- dark and white chocolate chunks or chips
- chocolate pieces and chopped pecans
- chocolate and chopped almonds
- dark chocolate and chopped hazelnuts
- white chocolate and dried cranberries
- raisins and chopped walnuts
- two types of chopped nuts
- chopped dried apricots and chopped unsalted pistachios
Your imagination is your only limit! Just make sure that the fruits, nuts, and/or chocolate pieces are all roughly the same size.
Travel photo of the week
Since the friend who gave me the recipe spend a couple of years living on Vancouver Island, I thought that I would show you one of my favourite beaches in the world (aside from the New Zealand ones of course!). This is Long Beach on the west coast of Vancouver Island. You can see where it got it’s not very imaginative name from. The beach is enormous and wild, and if you’re lucky, or unlucky depending on your opinion, you can come across one of the many of black bears who live on the island. They regularly scour the beach for food.
By Lisa Watson

Pam's Biscuits
Ingredients
- 120 g butter or shortening 1/2 cup
- 25 g white granulated sugar 1/4 cup
- 100 g dark brown sugar 1/2 cup
- 1 egg
- 1 tsp vanilla essence
- 240 g flour 2 cups
- 1/2 tsp baking soda
- 1/2 tsp salt
- 150 g chocolate chips 1 cup
Instructions
- Heat the oven to 180 degrees C (350 degrees F).With either a standing mixer, or a handheld mixer, cream the butter and sugar together until the mixture becomes pale and fluffy.If you don't have a mixer, use your very strong arm to beat them with a wooden spoon.
- Sift the flour, baking powder, and salt into the bowl with the creamed butter-sugar mixture.
Use a wooden spoon or a silicone spatula to mix everything together until you get a homogeneous mixture. - Add the chocolate chunks, and chopped nuts if using. Mix them in gently. I find that it is better to use your hands at this stage to mix the chocolate chunks in uniformly.
- Line a cookie sheet with baking paper.Use a teaspoon, or your hands, to take walnut-sized pieces off the dough.Roll each lump into a ball and place it on the cookie sheet.Squash each ball with a fork to flatten it out.
- Bake the cookies for 10 - 12 minutes until they start to turn a slightly golden-brown color. Take the cookie tray out of the oven and leave the cookies to cool on it for 10 minutes.Take the cookies off the tray and leave them on a wire cooling-rack to cool completely.
